How to access Windows servers console on Azure Cloud ? We had challenge to get the instance’s console on Azure in the past. Now, Azure offers text-based console for windows server instances using COM1 serial port. This article will walk you through how to access windows instance’s console on Microsoft Azure.
Prerequisites:
Windows Server 2012/2016 running instance
Boot diagnostics must be enabled for the instance
Accessing Windows Server Serial console:
1. Login to Azure portal.
2. Navigate to the Windows server instance for which you would like to access the serial console
Azure – Windows Server 2016 Console
3. Ensure boot diagnostics is enabled for the instance.
4. Navigate to the serial console and wait for few seconds to connect.
Windows Server 2016 – Console – SAC
5. Once the console is connected, you will get the SAC prompt.
Computer is booting, SAC started and initialized.
Use the "ch -?" command for information about using channels.
Use the "?" command for general help.
SAC>
EVENT: The CMD command is now available.
SAC>
6. Type “cmd” to create the to the server console channel.
SAC>cmd
The Command Prompt session was successfully launched.
SAC>
EVENT:   A new channel has been created.  Use "ch -?" for channel help.
Channel: Cmd0001
SAC>
7. Use the channel number to connect to the instance console. Use command “ch -si 1” and press Enter.
SAC> ch -si 1
 Name:                  Cmd0001
 Description:           Command
 Type:                  VT-UTF8
 Channel GUID:          e7f52da4-203b-11ea-a80f-000d3a7b44b4
 Application Type GUID: 63d02271-8aa4-11d5-bccf-00b0d014a2d0
 Press  for next channel.
 Press 0 to return to the SAC channel.
 Use any other key to view this channel.
8. Enter the windows instance user credentials to access windows command prompt.
Please enter login credentials.
Username: lingesh
Domain  :
Password:
9. Once you have authenticated successfully, you will get windows command prompt like below.
Azure – Windows Server – Command Prompt
Hope this article is informative to you. Share it! Comment it !! Be Sociable!!!
Azure offers four disk types of managed disks and we can choose any type based on the business needs. Azure provides an option to switch between the three GA disk types premium SSD, standard SSD, and standard HDD based on your performance needs. But Azure doesn’t provide an option to convert from or to an ultra SSD account type.
Disks can be resized or account type changed only when they are unattached or the owner VM is de-allocated.
Let’s see how to change the disk type from Premium SSD to Standard SSD.
1. Login to Azure Portal
2. Select the instance and click on “Disks” from settings tab. Ensure that instance is in stopped state.
Azure instance – Disk Type
3. Click on the disk which needs to be changed from premium account type to standard storage account.
4. Click on configuration from settings menu.
5. From the account type, change to the desired account type.
6. Here , I have changed the storage account type from premium SSD to standard SSD. Ensure that you have saved the settings.
7. Changing the storage account type would not take more than a minute. You could see similar notifications once the account type got changed.
8. Start the instance.
We have successfully converted the azure instance’s managed storage account type from premium SSD to standard SSD.
DNS resource records added automatically when windows instances is registered on domain. For Linux instances, you have to add the records manually on DNS server. Let’s explorer that how to create A records in DNS using Ansible Playbook. This playbook can be integrated as part of server provisioning workflow to speed up the build process.
Ansible Version – ansible 2.7.8
Step by Step Procedure:
1. Login to Ansible server.
2. Create a ansible playbook to create DNS records. Depends on environment and security restrictions, you need to find an option that could work for you.
DNS Server : DNSServerzone1
Operating System: Windows 2016 / 2012
Playbook:
---
- hosts: DNSServerzone1
  gather_facts: no
  tasks:
   - name: Add A record for newly build server
     win_shell: "Add-DnsServerResourceRecordA -Name {{ServerName}} -ZoneName {{Domain}} -AllowUpdateAny -IPv4Address {{IPAddress}} -TimeToLive 01:00:00"
     when: DOMAIN == "{{Domain}}"
Variables:
ServerName
Domain
IPAddress
3. Create windows DNS server inventory according to the server security settings. In my example, DNS servers are allowed to communicate using 5985 (http) port for winrm.
Ansible is very flexible configuration management tool and offers wide range of options to perform certain tasks. I am very often use Jinja2 template option to complete the following tasks.
Create configuration files using extra variables
Create email templates based on playbook results.
Prepare Terraform TF files.
Template Config files:
1. Let’s create a new playbook to update /etc/hosts file using template.
---
- hosts: all
  become: yes

  tasks:
    - name: Template the /etc/hosts file based on user variables.
      template:
         src: /var/tmp/hosts.j2
         dest: /var/tmp/hosts
How can I upload folders/directories to GitHub/GitLab repository? GitHub is a web-based version control platform to manage the codes. Git platform simplifies the process to collaborate with multiple people on projects. This article will walk you through the multiple methods of uploading the directories on existing git repositories.
Upload Methods:
Web-GUI
Desktop GitHub Client
Git client (Linux)
Git Bash (windows)
Web-GUI:
Using web-GUI, you can easily drag and drop the directories with files in the existing GitHub repository. Directories must contain files with the content on it.
1. Login to GitHub web GUI and navigate the repository in which you would like to upload the files.
GitHub – Repository
2. On your laptop, navigate to the directory that you need to upload to the GitHub repository.
Local code directories
3. Select the required directories which needs to be uploaded to GitHub. Just drag and drop in the Web-GUI of the GitHub page.
Drag and Drop Files on GitHub
4. I have uploaded the following directories and files to the GitHub.
Local directories and Files
5. Verify you work in GitHub by navigating within the repository.
GitHub – Files Uploaded from local filesystem
Empty directories and directories with empty files won’t be created in GitHub. GitHub always looks for files with data on it to create required directories and files.
We have successfully uploaded the codes from the local system to GitHub by using web-GUI. In the next article, we shall walk you through the other available methods.
Hope this article informative to you. Share it! Comment it!! Be sociable!!!
GitHub is a web-based version control platform to manage the codes. GitHub continuously offers many tools to manage the codes effectively. Desktop GitHub Client is one of the tools which can be used to manage the code from your laptop/desktop effectively. The desktop client can be installed with normal user privileges. You could also upload the codes directly using GitHub web-GUI
2. Click on the downloaded executable to install it. It doesn’t require admin privileges.
3. Once the GitHub is installed, you will get the welcome page like below.
Welcome GitHub-Desktop
4. You could also directly logging in to existing GitHub account to manage the repository. I have selected “skip to continue” to manually manage the repository. Just enter your name and email address to configure locally
GitHub Desktop – Configure Git
5. Click Finish complete the local configuration. You could also opt out sending periodic usage statistics to GitHub.
Finish – configure GitHub
Cloning Git Repository:
6. Copy the GitHub repository URL from webpage.
GitHub Repository web URL
7. In Desktop GitHub, click on “Clone a repository from the Internet”
Desktop GitHub – Clone Repo
8. Enter the copied repo URL and select the local directory path. Click on clone to pull the repository to local path.
GitHub Desktop – Clone a repository
9. Once the repository is cloned, you could see the following screen. It just displays that, we haven’t made any local changes so far. Click on “Show in explorer” to see the files and folders on the repo.
Cloned Repository – GitHub Desktop
10. Let’s make some changes on the README.MD file to test.
Repository Update – GitHub Desktop
11. Switch to GitHub Desktop. It will automatically detect the code changes. You could also copy directories and files to that path to upload to GitHub repository.
Changes detected by GitHub Desktop
12. Add meaningful comments to commit the changes. Click on “Commit to Master”
Commit to Master branch
13. Push the changes to the remote origin.
Push to the remote origin
14. You need to pass the valid credentials to authenticate the repo. Click on “Save and retry” to push the changes to git repository.
Authenticate GitHub to push the changes
15. Validate the changes in GitHub page.
Validate the code changes in GitHub
Using GitHub Desktop client, you can easily manage the codes locally. You could also make bulk code updates in few clicks irrespective of the number of directories and files.
In a September article here, we made note of the staggering projected growth rate of the business intelligence market. The article was titled ‘Global Business Intelligence Market to Be Worth $147.19 Billion in 2025’ and cited a Market Watch report predicting a CAGR of 26.98% between now and that time. In the same article, we pointed to various growth drivers that are contributing to progress in the collection and development of BI. For example, we noted that machine learning and blockchain development have put data generation into “overdrive,” and that SMEs and larger companies alike are in on the action.
Business Data
But how will all of this BI be applied? And specifically, which technologies will businesses use to leverage all of the data they’re going to be collected? In answering these questions, three things, in particular, come to mind.
Digital Marketing
Once upon a time — and not so very long ago in fact — digital marketing was thought of by many as a creative process. It involves clever and strategic writing, catchy branding, innovative outreach, and adaptation on the fly. Today those things are all still true, but they’re also driven, in successful operations, by data. Forbes covered the use of data in digital marketing in a piece just last year and pointed out the benefits quite clearly. It conveyed that companies collecting data for marketing can come to know their audiences, develop strategic keywords, and optimize their websites and campaigns accordingly. And these benefits will likely only become more pronounced in the next several years, as BI continues to develop and expand.
Manufacturing
The growth in BI also happens to be coinciding with a fairly substantial transition toward more advanced manufacturing processes. Across a vast variety of industries, methods like CNC machining, 3D printing, and injection molding are being used to design and produce goods. This makes for more precise production, and in providing information about all three methods, Fictiv cites “unprecedented speeds” for production orders as another benefit. However, the potential connectivity of the machines behind these processes will also matter a great deal when combined with data analysis. Many companies will soon be able to set up their data collection operations to drive production directly, feeding information to machinery that directs the actual creation of products according to need.
IoT Processes
IoT processes are in some ways the most interesting things to consider when we think about how enterprises will leverage the troves of data they’re poised to collect in the coming years. This is because they make for something of a two-way street. Digitalist Mag’s take on the role of IoT in businesses becoming more intelligent stated that much of the data that’s going to be gathered will originate from IoT devices — in the supply chain, operations, manufacturing centers, and elsewhere. This is an undeniable truth. At the same time, however, data will also be fed back to other IoT devices in order to direct action to optimize efficiency. For example, a shipping fleet vehicle might have sensors designed to recognize traffic patterns; these sensors could communicate data to an advanced GPS, also connected as an IoT device, which could then re-route the driver as needed. In this way, the IoT can both drive and respond to massive data gathering.
Improved efficiency and added functionality in these areas will undoubtedly be among the more tangible benefits of enhanced BI in the coming years
Azure offers multiple methods to protect the data of Linux and Windows VM’s. But it’s up to the business to determine what kind of backup needed. This article will debate over azure native backup vs Azure disk snapshot.
Azure native backup uses a recovery service vault to store the data. What is the recovery service vault? Recovery service vault is an online-storage entity in Azure that’s used to hold data, such as backup copies, recovery points, and backup policies. At the time of writing this article, each subscription can hold up to 500 recovery service vault and supports both Local-redundant storage(LRD) and Geo-redundant storage (GRS).
Azure Recovery Services vault
Azure VM Backup: How it works ?
The backup extension is mandatory for both windows and Linux instances. The extension is responsible for storage-level snapshot.
On Windows servers, Backup extension coordinates with the Windows Volume Shadow Copy Service (VSS) to take an app-consistent snapshot of the VM. By default, Backup takes full VSS backups.
On Linux servers, extension takes a file-consistent snapshot. For app-consistent snapshots, you need to manually customize pre/post scripts.
Backup is optimized by backing up each VM disk in parallel. For each disk being backed up, Azure Backup reads the blocks on disk and stores only the changed data.
Once the snapshot is taken, the data will be transferred to the vault.
Once the data has been sent to the vault, a recovery point will be created.
Azure Native Backup – Recovery Service Vault
Key Advantages using Azure Backup
Users can directly restore the VM using azure backup.
Supports backup polices and Can be configured according to our needs
Users can restore VM directly (Overwrite)! By default, snapshots are retained for two days before they are deleted. This feature allows restoring operation from these snapshots, thereby cutting down the restore times. It reduces the time that’s required to transform and copy data back from the vault.
Azure Managed Disk Snapshot
Azure disk snapshot feature is often confused with backup. It’s one of the quick backup methods to troubleshoot VM issues or test the configuration changes by keeping the safe snapshot. A managed disk snapshot is a read-only crash-consistent full copy of a managed disk that is stored as a standard managed disk by default. With snapshots, you can back up your managed disks at any point in time
The biggest difference is that we can use Azure Backup to restore VM directly. But if we use disk snapshot and want to restore VM, we have to use the snapshot to create OS disk and then use this OS disk to create a new VM.
Azure Disk snapshot backup & recovery
Hope this article is informative to you. Share it! Comment it! Be Sociable !!!
How to launch bash or PowerShell from the Azure portal? Azure offers cloud based shell access for advanced users almost from every corner. Microsoft maintains a cloud shell with commonly used CLI tools including Linux shell interpreters, PowerShell modules, Azure tools, text editors, source control, build tools, container tools, database tools, and more. Azure Cloud Shell also includes language support for several popular programming languages such as Node.js, .NET, and Python.
Enable Azure Cloud BASH shell
1. Login to Azure portal.
2. Click on the Cloud shell icon. Top right – > Next to the search bar. (highlighted)
Launch Azure Cloud shell
3. If you are familiar with bash, select bash shell to launch.
Bash Powershell – Azure Cloud Shell
4. Select the subscription and storage account. If you do not have existing storage account , you need to create a one.
Select the storage account or create – Azure
5. Once the cloud drive is created, cloud shell will be launched.
Initializing account for Cloud Shell
6. Here is the bash prompt.
Azure Bash shell – Welcome
How to launch PowerShell?
1. Select powershell from the drop down list.
Select Powershell – Cloud Shell
2. Azure container will relaunch and will provide powershell.
How to use terraform from Azure cloud shell? Do we need to install an additional package to use terraform? Nope. Azure provides commonly used CLI tools including Linux shell interpreters, PowerShell modules, Azure tools, text editors, source control, build tools (ex: terraform), and more in cloud shell. This makes azure builders to quickly deploy Azure resources using ARM templates or terraform. This article will demonstrate how to use terraform and deploy vNet using a piece of code.
UA@Azure:~/clouddrive/terraform/vnet$ ls -lrt
total 2
-rwxrwxrwx 1 lingesh lingesh 317 May 24 17:16 create_vnet.tf
UA@Azure:~/clouddrive/terraform/vnet$
5. Initialize the terraform binaries. This step will download the required plugins.
UA@Azure:~/terraform/vnet$ terraform init
Initializing the backend…
Initializing provider plugins…
Checking for available provider plugins…
Downloading plugin for provider "azurerm" (hashicorp/azurerm) 2.11.0…
Terraform has been successfully initialized!
You may now begin working with Terraform. Try running "terraform plan" to see
any changes that are required for your infrastructure. All Terraform commands
should now work.
If you ever set or change modules or backend configuration for Terraform,
rerun this command to reinitialize your working directory. If you forget, other
commands will detect it and remind you to do so if necessary.
UA@Azure:~/terraform/vnet$
6. Validate the terraform plan.
UA@Azure:~/terraform/vnet$ terraform plan
Refreshing Terraform state in-memory prior to plan…
The refreshed state will be used to calculate this plan, but will not be
persisted to local or remote state storage.

An execution plan has been generated and is shown below.
Resource actions are indicated with the following symbols:
create
Terraform will perform the following actions:
# azurerm_virtual_network.main will be created
resource "azurerm_virtual_network" "main" { address_space = [ "10.125.0.0/16",
]
guid = (known after apply)
id = (known after apply)
location = "westus2"
name = "UAVnet"
resource_group_name = "UArg"
subnet = (known after apply)
tags = { "environment" = "UnixArena test"
}
}
Plan: 1 to add, 0 to change, 0 to destroy.

Note: You didn't specify an "-out" parameter to save this plan, so Terraform
can't guarantee that exactly these actions will be performed if
"terraform apply" is subsequently run.
UA@Azure:~/terraform/vnet$
7. Create the azure resource by executing terraform apply command.
UA@Azure:~/terraform/vnet$ terraform apply
An execution plan has been generated and is shown below.
Resource actions are indicated with the following symbols:
create
Terraform will perform the following actions:
# azurerm_virtual_network.main will be created
resource "azurerm_virtual_network" "main" { address_space = [ "10.125.0.0/16",
]
guid = (known after apply)
id = (known after apply)
location = "westus2"
name = "UAVnet"
resource_group_name = "UArg"
subnet = (known after apply)
tags = { "environment" = "UnixArena test"
}
}
Plan: 1 to add, 0 to change, 0 to destroy.
Do you want to perform these actions?
Terraform will perform the actions described above.
Only 'yes' will be accepted to approve.
Enter a value: yes
azurerm_virtual_network.main: Creating…
azurerm_virtual_network.main: Still creating… [10s elapsed]
azurerm_virtual_network.main: Creation complete after 12s [id=/subscriptions/585051ec-7aa0-48ab-a172-d1260ad72ee5/resourceGroups/UArg/providers/Microsoft.Network/virtualNetworks/UAVnet]
Apply complete! Resources: 1 added, 0 changed, 0 destroyed.
UA@Azure:~/terraform/vnet$
8. You could go back and check in the azure portal to validate the resource which we had deployed now.
UAVnet – Test azure resource
Hope this article is informative to you. Please share your feedback.
How fast you can spin up a VM in Azure Cloud? Have you experienced an azure cloud shell and terraform builder tool? Let’s quickly spin up a Linux VM using terraform code from Azure Cloud Shell. There are 100 ways to build the VM but this article just shows the robustness of the terraform and command line.
3. Execute terraform plan to preview the deployment .
UA@Azure:~/clouddrive/terraform/linux_vm$ terraform plan
Refreshing Terraform state in-memory prior to plan...
The refreshed state will be used to calculate this plan, but will not be
persisted to local or remote state storage.

data.azurerm_resource_group.main: Refreshing state...
data.azurerm_virtual_network.main: Refreshing state...
data.azurerm_subnet.main: Refreshing state...

------------------------------------------------------------------------

An execution plan has been generated and is shown below.
Resource actions are indicated with the following symbols:
  + create

Terraform will perform the following actions:

  # azurerm_linux_virtual_machine.main will be created
  + resource "azurerm_linux_virtual_machine" "main" {
      + admin_password                  = (sensitive value)
      + admin_username                  = "azureuser"
      + allow_extension_operations      = true
      + computer_name                   = "myvm"
      + disable_password_authentication = false
      + id                              = (known after apply)
      + location                        = "westus2"
      + max_bid_price                   = -1
      + name                            = "UAvm1"
      + network_interface_ids           = (known after apply)
      + priority                        = "Regular"
      + private_ip_address              = (known after apply)
      + private_ip_addresses            = (known after apply)
      + provision_vm_agent              = true
      + public_ip_address               = (known after apply)
      + public_ip_addresses             = (known after apply)
      + resource_group_name             = "UArg"
      + size                            = "Standard_DS1_v2"
      + tags                            = {
          + "environment" = "UnixArena Terraform Demo"
        }
      + virtual_machine_id              = (known after apply)
      + zone                            = (known after apply)

      + os_disk {
          + caching                   = "ReadWrite"
          + disk_size_gb              = (known after apply)
          + name                      = "UAvm1OSdisk"
          + storage_account_type      = "Standard_LRS"
          + write_accelerator_enabled = false
        }

      + source_image_reference {
          + offer     = "CentOS"
          + publisher = "OpenLogic"
          + sku       = "7.5"
          + version   = "latest"
        }
    }

  # azurerm_network_interface.main will be created
  + resource "azurerm_network_interface" "main" {
      + applied_dns_servers           = (known after apply)
      + dns_servers                   = (known after apply)
      + enable_accelerated_networking = false
      + enable_ip_forwarding          = false
      + id                            = (known after apply)
      + internal_dns_name_label       = (known after apply)
      + internal_domain_name_suffix   = (known after apply)
      + location                      = "westus2"
      + mac_address                   = (known after apply)
      + name                          = "UAvm1-nic"
      + private_ip_address            = (known after apply)
      + private_ip_addresses          = (known after apply)
      + resource_group_name           = "UArg"
      + tags                          = {
          + "environment" = "UnixArena Terraform Demo"
        }
      + virtual_machine_id            = (known after apply)

      + ip_configuration {
          + name                          = "UAvm1-ip"
          + primary                       = (known after apply)
          + private_ip_address            = (known after apply)
          + private_ip_address_allocation = "dynamic"
          + private_ip_address_version    = "IPv4"
          + subnet_id                     = "/subscriptions/585051ec-7aa0-48ab-a172-d1260ad72ee5/resourceGroups/UArg/providers/Microsoft.Network/virtualNetworks/UAVnet/subnets/test"
        }
    }

Plan: 2 to add, 0 to change, 0 to destroy.

------------------------------------------------------------------------

Note: You didn't specify an "-out" parameter to save this plan, so Terraform
can't guarantee that exactly these actions will be performed if
"terraform apply" is subsequently run.

UA@Azure:~/clouddrive/terraform/linux_vm$
4. If the preview of the deployment looks fine, execute terraform apply to create the VM.
UA@Azure:~/clouddrive/terraform/linux_vm$ terraform apply
data.azurerm_resource_group.main: Refreshing state...
data.azurerm_virtual_network.main: Refreshing state...
data.azurerm_subnet.main: Refreshing state...

An execution plan has been generated and is shown below.
Resource actions are indicated with the following symbols:
  + create

Terraform will perform the following actions:

  # azurerm_linux_virtual_machine.main will be created
  + resource "azurerm_linux_virtual_machine" "main" {
      + admin_password                  = (sensitive value)
      + admin_username                  = "azureuser"
      + allow_extension_operations      = true
      + computer_name                   = "myvm"
      + disable_password_authentication = false
      + id                              = (known after apply)
      + location                        = "westus2"
      + max_bid_price                   = -1
      + name                            = "UAvm1"
      + network_interface_ids           = (known after apply)
      + priority                        = "Regular"
      + private_ip_address              = (known after apply)
      + private_ip_addresses            = (known after apply)
      + provision_vm_agent              = true
      + public_ip_address               = (known after apply)
      + public_ip_addresses             = (known after apply)
      + resource_group_name             = "UArg"
      + size                            = "Standard_DS1_v2"
      + tags                            = {
          + "environment" = "UnixArena Terraform Demo"
        }
      + virtual_machine_id              = (known after apply)
      + zone                            = (known after apply)

      + os_disk {
          + caching                   = "ReadWrite"
          + disk_size_gb              = (known after apply)
          + name                      = "UAvm1OSdisk"
          + storage_account_type      = "Standard_LRS"
          + write_accelerator_enabled = false
        }

      + source_image_reference {
          + offer     = "CentOS"
          + publisher = "OpenLogic"
          + sku       = "7.5"
          + version   = "latest"
        }
    }

  # azurerm_network_interface.main will be created
  + resource "azurerm_network_interface" "main" {
      + applied_dns_servers           = (known after apply)
      + dns_servers                   = (known after apply)
      + enable_accelerated_networking = false
      + enable_ip_forwarding          = false
      + id                            = (known after apply)
      + internal_dns_name_label       = (known after apply)
      + internal_domain_name_suffix   = (known after apply)
      + location                      = "westus2"
      + mac_address                   = (known after apply)
      + name                          = "UAvm1-nic"
      + private_ip_address            = (known after apply)
      + private_ip_addresses          = (known after apply)
      + resource_group_name           = "UArg"
      + tags                          = {
          + "environment" = "UnixArena Terraform Demo"
        }
      + virtual_machine_id            = (known after apply)

      + ip_configuration {
          + name                          = "UAvm1-ip"
          + primary                       = (known after apply)
          + private_ip_address            = (known after apply)
          + private_ip_address_allocation = "dynamic"
          + private_ip_address_version    = "IPv4"
          + subnet_id                     = "/subscriptions/585051ec-7aa0-48ab-a172-d1260ad72ee5/resourceGroups/UArg/providers/Microsoft.Network/virtualNetworks/UAVnet/subnets/test"
        }
    }

Plan: 2 to add, 0 to change, 0 to destroy.

Do you want to perform these actions?
  Terraform will perform the actions described above.
  Only 'yes' will be accepted to approve.

  Enter a value: yes

azurerm_network_interface.main: Creating...
azurerm_network_interface.main: Creation complete after 2s [id=/subscriptions/585051ec-7aa0-48ab-a172-d1260ad72ee5/resourceGroups/UArg/providers/Microsoft.Network/networkInterfaces/UAvm1-nic]
azurerm_linux_virtual_machine.main: Creating...
azurerm_linux_virtual_machine.main: Still creating... [10s elapsed]
azurerm_linux_virtual_machine.main: Still creating... [20s elapsed]
azurerm_linux_virtual_machine.main: Still creating... [30s elapsed]
azurerm_linux_virtual_machine.main: Still creating... [40s elapsed]
azurerm_linux_virtual_machine.main: Still creating... [50s elapsed]
azurerm_linux_virtual_machine.main: Still creating... [1m0s elapsed]
azurerm_linux_virtual_machine.main: Still creating... [1m10s elapsed]
azurerm_linux_virtual_machine.main: Still creating... [1m20s elapsed]
azurerm_linux_virtual_machine.main: Still creating... [1m30s elapsed]
azurerm_linux_virtual_machine.main: Creation complete after 1m37s [id=/subscriptions/585051ec-7aa0-48ab-a172-d1260ad72ee5/resourceGroups/UArg/providers/Microsoft.Compute/virtualMachines/UAvm1]

Apply complete! Resources: 2 added, 0 changed, 0 destroyed.
UA@Azure:~/clouddrive/terraform/linux_vm$
5. You can login to portal and check the newly created VM.
Terraform UnixArena VM deployment
Hope this article is informative to you. Share it! Comment it!! Be sociable!!!
How to enable Azure native backup for Linux and Windows instances in Azure? To enable the Azure native backup, you need to set up a recovery service vault. Recovery service vault is an online-storage entity in Azure that’s used to hold data, such as backup copies, recovery points, and backup policies. It supports both Local-redundant storage(LRD) and Geo-redundant storage (GRS).
Note: Azure native backup requires VM agent to be installed on the servers. This enables backup extension can communicate with azure backup services.
Create recovery Service vault
1. Login to azure portal.
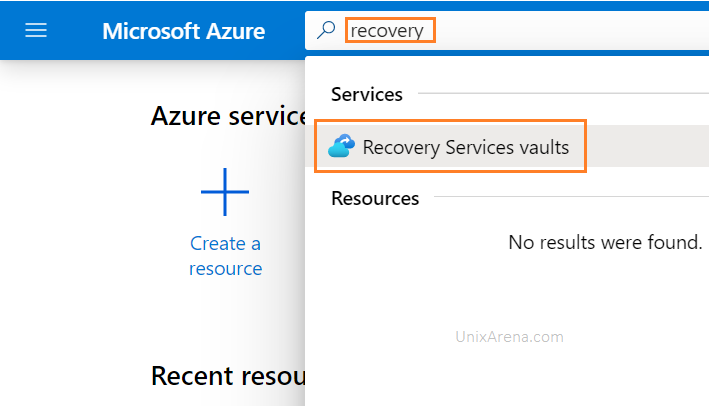
2. Navigate to recovery service vault page.
Azure Recovery services vault
3. Create a new recovery service vault.
Add recovery service vault
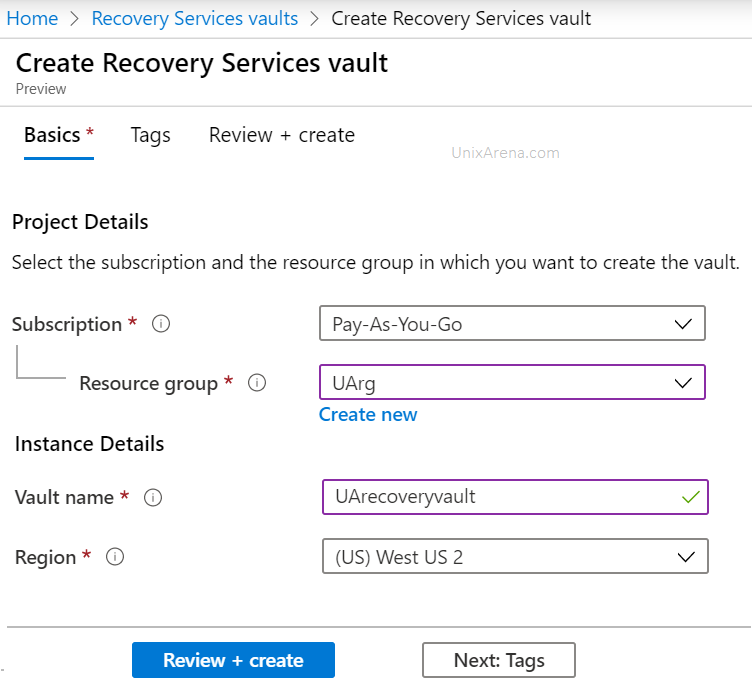
4. Select the subscription and resource group. Enter the vault name and select the region.
Azure recovery service vault – select region and subscription
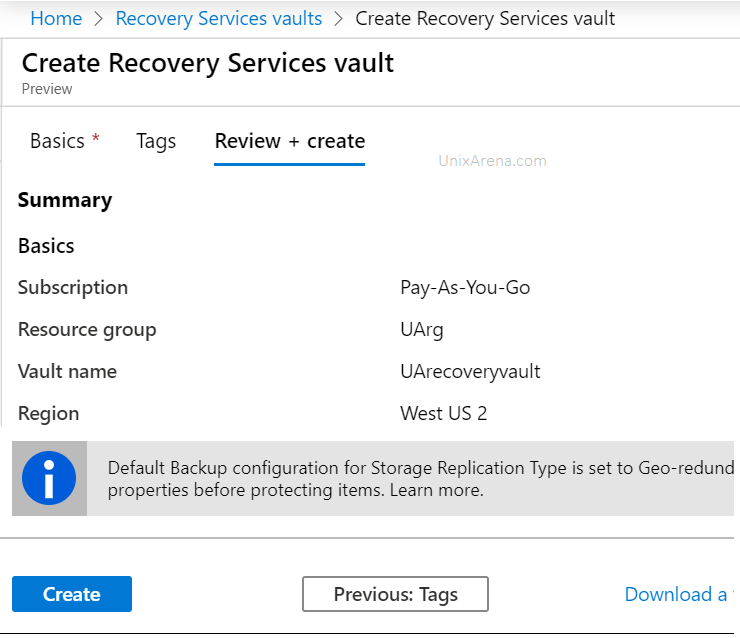
5. Click on create .
Review and Create – Recovery services vault
Configure azure backup policy
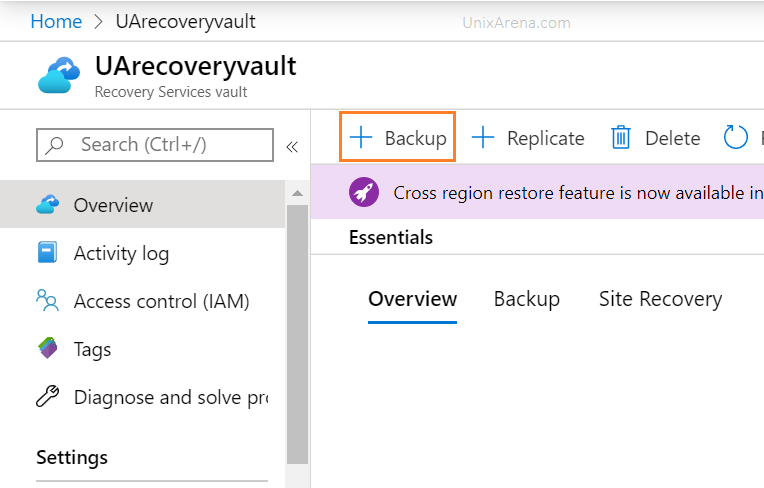
1. Click on newly created recovery service vault and click on backup
Click on Backup to configure Recovery Service vault
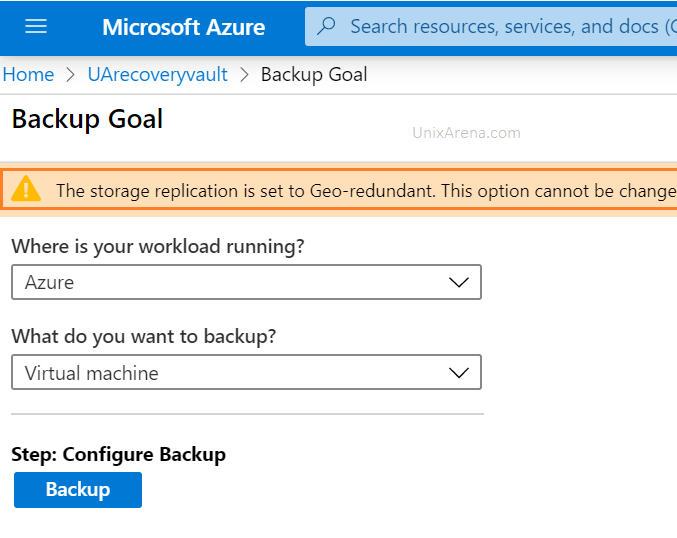
2. Select the workload type. Click on highlighted link to choose between geo-redundant vs local redundant.
Select the workload and type of workload
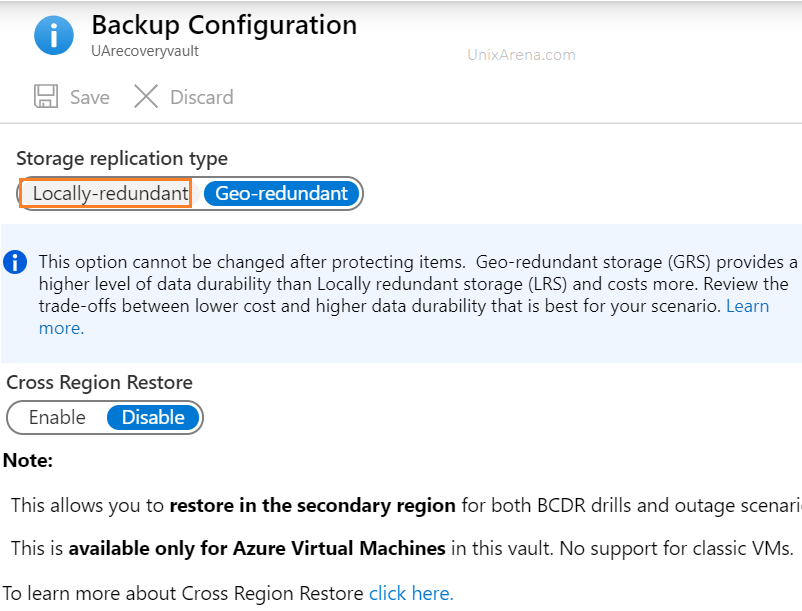
3. Based on your requirement, you choose the type of data redundancy. Since my workload is not so critical, i am choosing local redundant.
Backup configuration – Recovery service vault
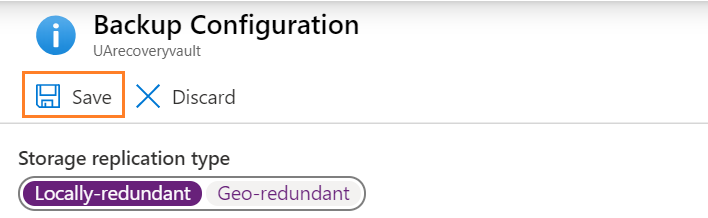
4. Save the configuration. Click on Backup to configure the policy.
Backup configuration – Recovery service vault – Locally redundant
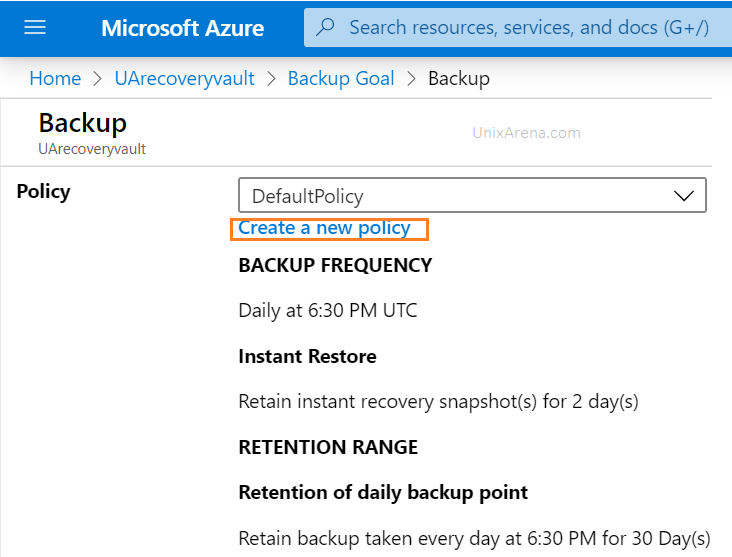
5. Create a custom policy according to you need.
Create new policy to configure the snapshot and backup retention periods
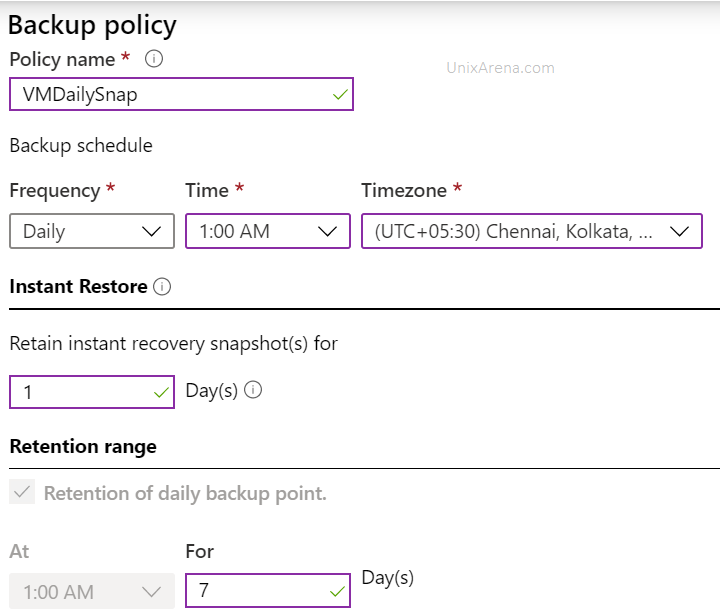
6. Enter the policy name and select the frequency, retention period for daily.
instant snapshot and retention of daily backup point
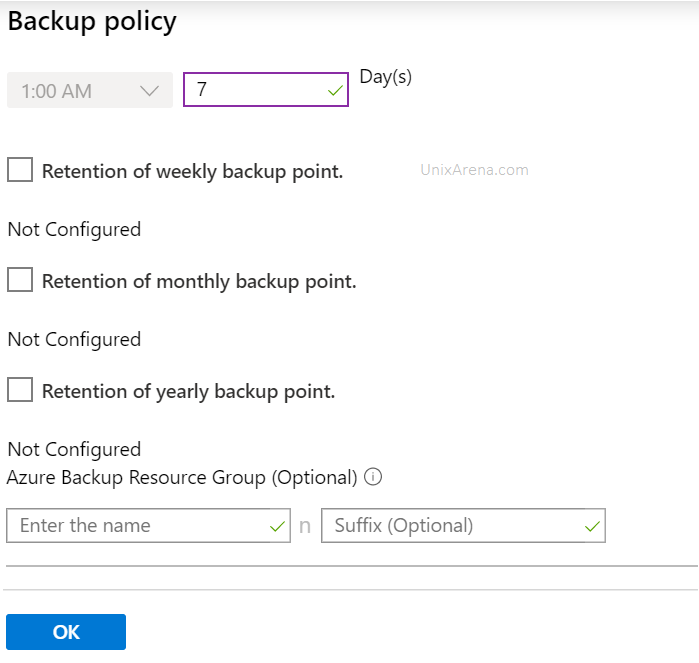
7. You have option to configure weekly, monthly and yearly retention as well. Click “OK” to create the policy.
Backup policy – retention weekly Monthly yearly
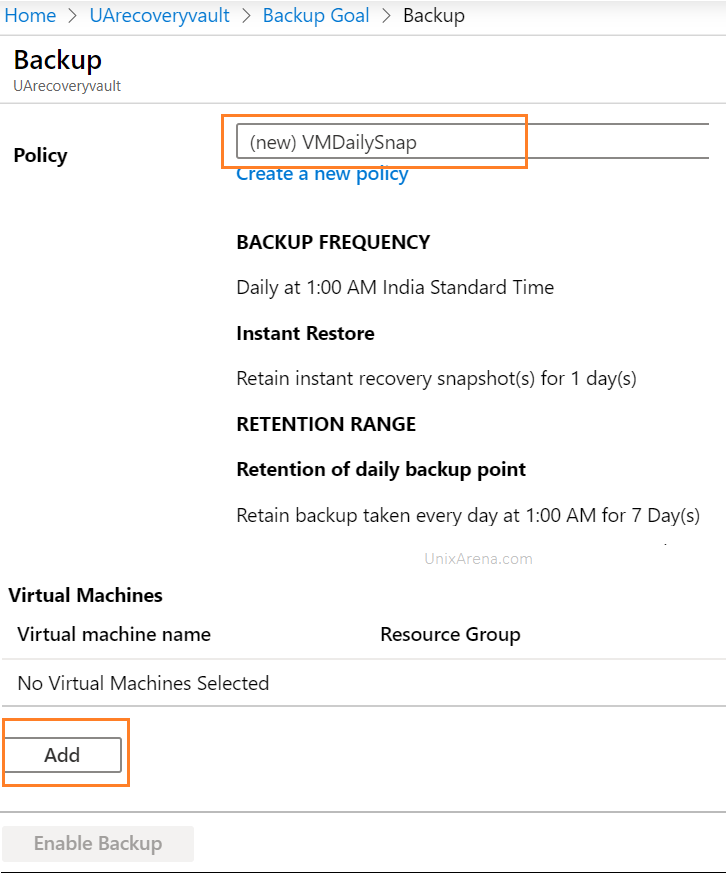
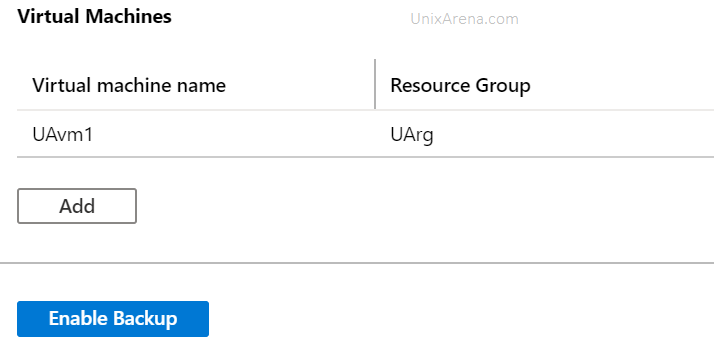
8. Add a Linux/Windows virtual machine to enable to newly configured backup.
Select the virtual machine to add in backup
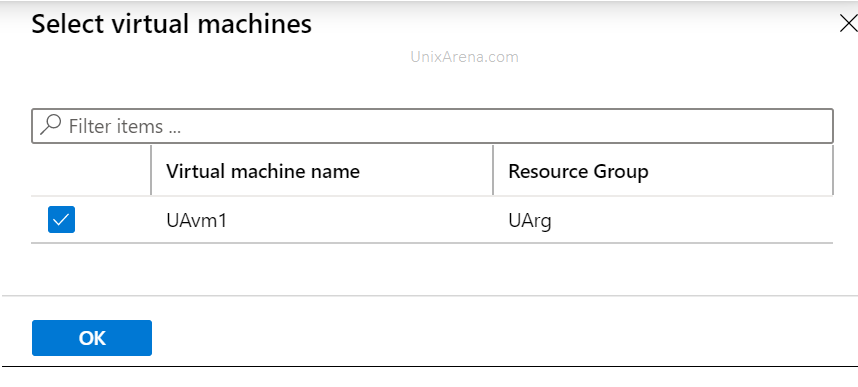
9. Select the virtual machine.
Select the Virtual machine
11. Click on “Enable Bakcup”
Enable Backup
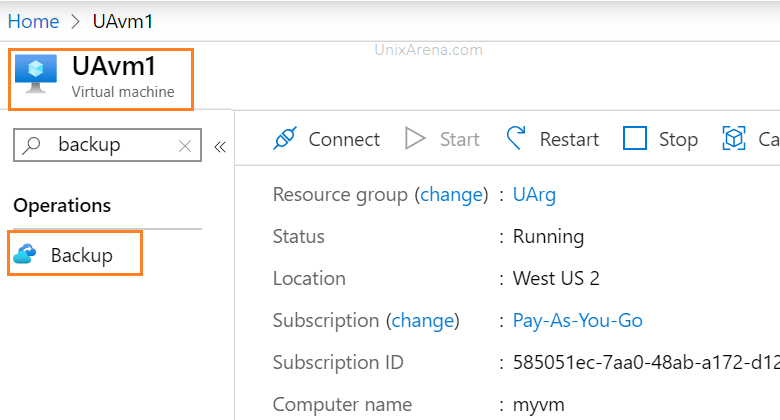
12. You can also enable backup from VM’s backup section.
Search VM and click on Backup
Validate the azure backup
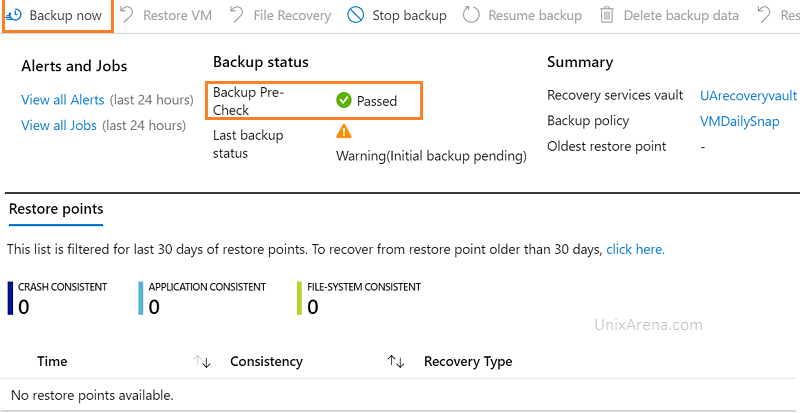
1. Navigate to backup items or VM which we had selected to take backup.
Search VM and click on Backup
2. You could see the message that backup’s pre-check might passed in a few minutes.
VM Backup status
Hope this article is informative to you. Share it! Comment it!! Be Sociable!!!
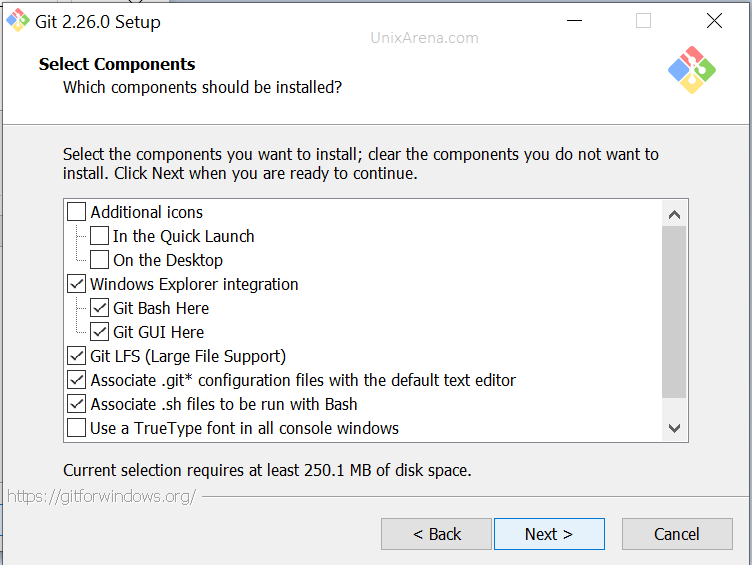
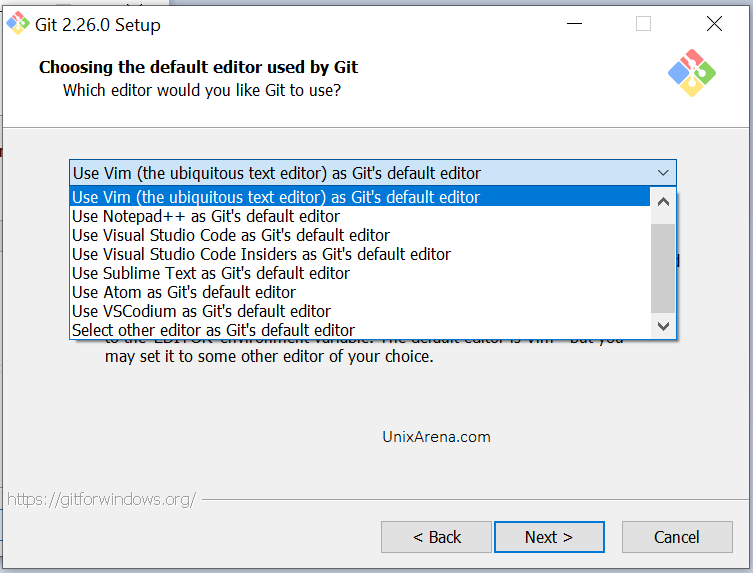
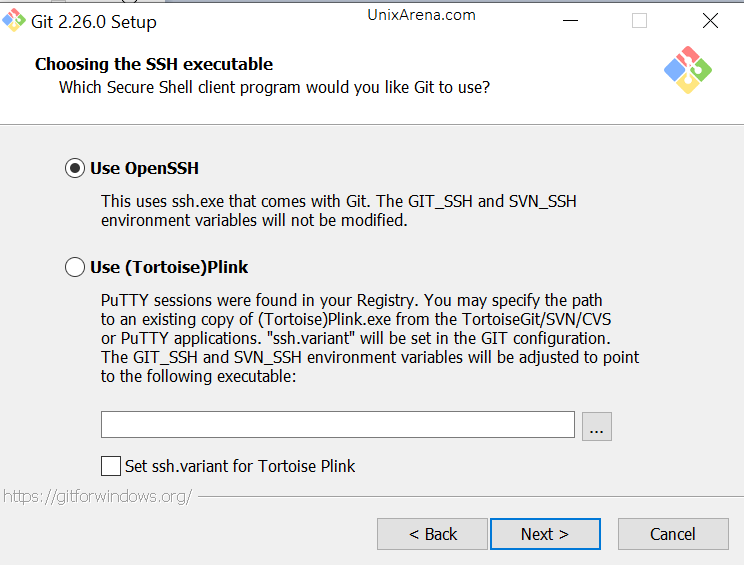
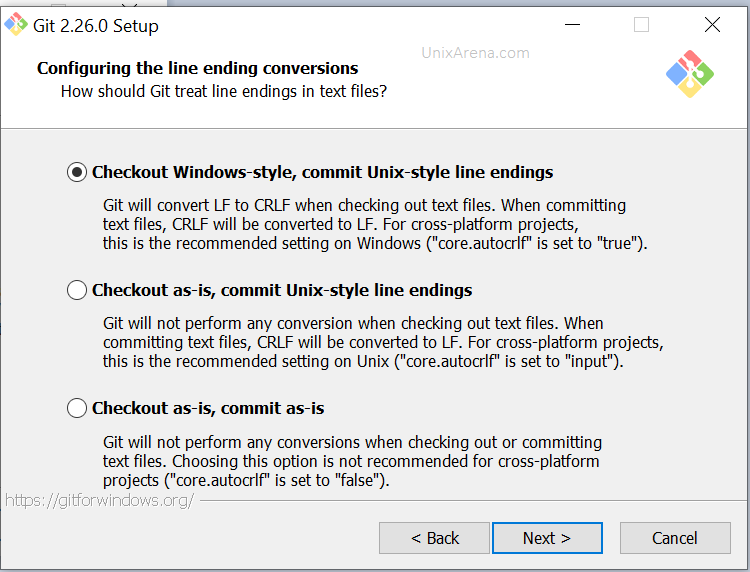
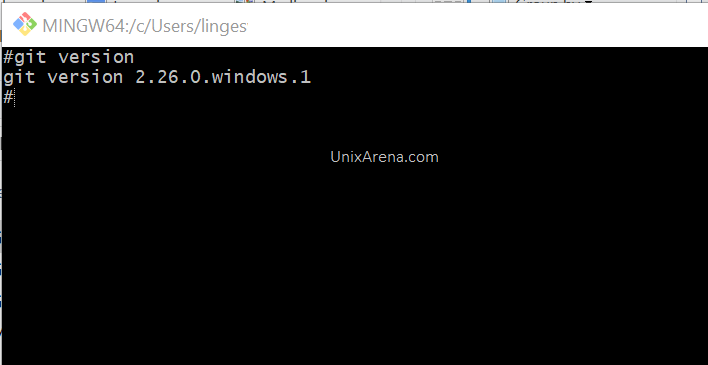
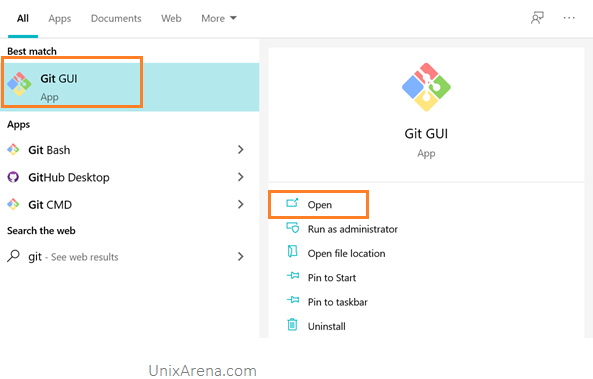
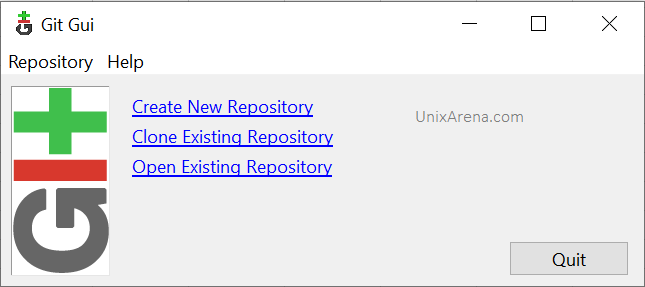
Git repositories can be managed using git-bash on windows operating systems. Git for Windows provides a BASH emulation used to run Git from the command line. *NIX users will feel right at home, as the BASH emulation behaves just like the “git” command in LINUX environments. As Windows users commonly expect graphical user interfaces, Git for Windows also provides the Git GUI offering comprehensive visual diff tools.
How to generate a CSR (certificate signing request) file to produce a valid certificate for web-server or any application? This article will walk you through how to create a CSR file using the OpenSSL command line, how to include SAN (Subject Alternative Names) along with the common name, how to remove PEM password from the generated key file.
Generating CSR file with common name
1.Login to Linux server where the OpenSSL utility is available.
#  openssl req -new -newkey rsa:2048 -nodes -keyout server.key -out server.csr
Generating a 2048 bit RSA private key
..............................................................+++
.............+++
writing new private key to 'server.key'
-----
You are about to be asked to enter information that will be incorporated
into your certificate request.
What you are about to enter is what is called a Distinguished Name or a DN.
There are quite a few fields but you can leave some blank
For some fields there will be a default value,
If you enter '.', the field will be left blank.
-----
Country Name (2 letter code) [XX]:IN
State or Province Name (full name) []:TAMILNADU
Locality Name (eg, city) [Default City]:COIMBATORE
Organization Name (eg, company) [Default Company Ltd]:VSTACKL
Organizational Unit Name (eg, section) []:IT
Common Name (eg, your name or your server's hostname) []:vstackl.com
Email Address []:su*******h@gmail.com

Please enter the following 'extra' attributes
to be sent with your certificate request
A challenge password []:
An optional company name []:
# ls -lrt server*
-rw-r--r-- 1 root root 1708 Apr 25 17:08 server.key
-rw-r--r-- 1 root root 1062 Apr 25 17:08 server.csr
#
2. Validate the CSR file by decoding it in the online portal. Copy the certificate content and paste it on the portal page.
CSR file validation
3. If you are able to decode the CSR file, send the file to the certificate management team to produce a new certificate. Mostly active directory team handles this request in an enterprise organization.
3. Based on the CSR file , they can generate a new certificate . Please safely keep server.key for certificate implementation.
Generating CSR file with the common name and SAN’s
1.Create a new file with SAN’s . You can have more than one SAN (subject alternative name)
[ req ]
default_bits       = 2048
distinguished_name = req_distinguished_name
req_extensions     = req_ext
[ req_distinguished_name ]
countryName                 = Country Name (2 letter code)
stateOrProvinceName         = State or Province Name (full name)
localityName               = Locality Name (eg, city)
organizationName           = Organization Name (eg, company)
commonName                 = Common Name (e.g. server FQDN or YOUR name)
[ req_ext ]
subjectAltName = @alt_names
[alt_names]
DNS.1   = vstackl.com
DNS.2   = www.vstackl.com
DNS.3   = cloudstack.com
In the above file, i had added three SAN’s .
vstackl.com
www.vstackl.com
cloudstack.com
2. Execute the following command to generate the CSR with multiple SAN. Here, I added PEM pass phase for additional security.
# openssl req -new -newkey rsa:2048  -keyout server.key -out server.csr -config san_cnf
Generating a 2048 bit RSA private key
.........................................+++
.......................+++
writing new private key to 'server.key'
Enter PEM pass phrase:
Verifying - Enter PEM pass phrase:
-----
You are about to be asked to enter information that will be incorporated
into your certificate request.
What you are about to enter is what is called a Distinguished Name or a DN.
There are quite a few fields but you can leave some blank
For some fields there will be a default value,
If you enter '.', the field will be left blank.
-----
Country Name (2 letter code) []:IN
State or Province Name (full name) []:TAMILNADU
Locality Name (eg, city) []:COIMBATORE
Organization Name (eg, company) []:VSTACKL
Common Name (e.g. server FQDN or YOUR name) []:vstackl.com
3. You can validate the CSR(decode) file using the sslshopper portal .
certificate file SAN v2
How to remove PEM passphrase from key file ?
You could encounter an issue while restarting web servers after implementing a new certificate. In many cases, PEM passphrase won’t allow reading the key file. You want to remove the PEM passphrase, run the following command to stripe-out key without a passphrase.
Error : “PEM_read_bio:no start line error” nginx error
You could run an Nginx validation to know if the issue with a passphrase or not. If it’s prompt for a password, you can remove the passphrase from the key file.
# /usr/sbin/nginx -c /etc/nginx/nginx.conf -t
nginx: the configuration file /etc/nginx/nginx.conf syntax is ok
nginx: configuration file /etc/nginx/nginx.conf test is successful
Here is the command to stripped out key. You must pass the passpharse for this action.
#  openssl rsa -in  server.key -out server-stripped.key
Enter pass phrase for server.key:
writing RSA key
#
Backup plays a crucial role in infrastructure management. Backup could be anything like flat files, Operating system files, database files and application files, etc. Backup also needs to be consistent to recovery the respective object failures. This article will walk you through how to recover Azure VM (Windows/Linux) from failure or accidental VM delete. VM should be protected in azure native backup for recovery.
Crashed VM !!!
VM crashed – Need to recover – Azure
Crashed VM is Protected ! Let’s restore it!!!
1. UAvm1 is crashed and not booting. Navigate to backup tab and click on Restore VM button.
UAvm1 is protected by Azure native backup
2. It starts the wizard and prompts to select the restore point. Click on “Select”
Select restore point – Virtual machine
3. Select any one of the listed recovery point. Restore point should be created prior to the VM crash.
Select the restore point – from Period
4. Restore the VM by replacing existing VM disks. These options only work if the VM is exited in the portal. You must provide additional storage account for staging purpose.
Replacing existing VM disks
5. Follow the azure notifications. Once the job is triggered click on the job link.
Azure Notifications
6. If you followed the job link, you will get the screen below. You could see that even the backup job triggered. Azure Backup takes a snapshot of the existing VM before replacing the disk and stores it in the staging location which you specified.
Restore Job in progress – Azure VM
7. Here is the sub tasks for the restore.
Restore Job in progress – Sub Tasks
8. Once the restore job is completed, you are good to start the VM. Backup job might take some and we no need to wait for that.
Restore Job Completed – Azure VM
9. Go ahead and start the VM.
CentOS Linux 7 (Core)
Kernel 3.10.0-862.11.6.el7.x86_64 on an x86_64
myvm login: azureuser
Password:
Last login: Mon Jun 1 07:47:10 on ttyS0
[azureuser@myvm ~]$ date
Mon Jun 1 10:43:04 UTC 2020
[azureuser@myvm ~]$ uptime
10:43:06 up 3:02, 1 user, load average: 0.14, 0.06, 0.06
[azureuser@myvm ~]$
If VM deleted by mistake? How to recover?
1.The following image shows that VM and all the a VM OS disk has been deleted.
VM deleted
2. Navigate to recover service vaults and select the backup items.
Recovery Services Vaults
3. Select Azure virtual machine tab.
Azure Virtual Machines – Backup item
4. Here is the only difference when you compare with overwriting the existing VM disk. (Refer step: 4 – Scroll up and check it )
Restore virtual machine – by Creating new VM
5. Rest of restore follows same as previous restore.
Ansible tower requires a valid license to run any job. Red Hat License management is much easier if you directly manage from the Red Hat subscription portal. But in some cases, you might receive the license from Red Hat sales execute to renew/extended the licenses. This article will cover both scenarios to extend expired licenses.
Note:
If trail license expired: Ansible Tower instance is locked into read-only like state until a new valid license is provided. The instance is read-only immediately after the expiration
If Non-trial license expiry – the Ansible Tower instance is functioning in limited fashion after the active license has expired for an additional 30 days.
Scenario#1
Assuming that your ansible tower instance is having internet connectivity and you have access to the Red Hat Subscription portal to manage the licenses.
1.Login to ansible tower with admin privileges.
2. Navigate to Settings – > License tab.
3. Enter the red-hat subscription portal username and password. Click on get licenses.
Ansible Tower license Page
4. Select the newly procured licenses.
Select the purchased license
Scenario#2
Here is the second scenario where you might receive the license key files from Red Hat directly. On expired ansible tower instance, you can’t directly import the license key file using the web interface. You need to use an API URL (/api/v2/config) to post the newly received license keys.
1.Navigate to the Ansible Tower’s config API URL. (https://tower.example.com/api/v2/config/)
2. Paste the license key in content after adding “eula_accepted” : “true” . Click on POST to update the new license keys.
License key file – Red Hat Ansible Tower – Example
You could also the perform the same using any API tools. The following examples show how to update the licenses using curl & tower-cli
Ansible Tower offers various REST API to integrate with other tools. I had come across the scenario where the playbook needs to update tower inventory after provisioning cloud instance. tower-cli is one of the methods to update/import inventory on ansible tower but at the time of writing this article, tower-cli is not supported by Red Hat. After a few research, I found the way to update inventory using API and also adding the host in multiple groups.
1. Login to Ansible tower and navigate to inventory to find out the group id. Just hover the mouse on the inventory group to know the group id.
2. Let’s assume that group id is 1. Here is the ansible task block which will add the passing variables in tower inventory. Return code is going to be 201 for adding the host for the first time on the tower. Create the playbook with the following content. (add_ansible_tower.yaml). Replace tower host URL with yours.
How to add the host into multiple ansible tower groups?
1. Here is the block of code which adds the hosts in to multiple group. URI status code should be 204 for invoking api for second time to add the host in to other groups.
---
- hosts: localhost

  tasks:
   - name: Update Ansible Tower inventory to the first group
     uri:
      url: https://tower.example.com/api/v2/groups/{{GROUP1}}/hosts/
      user: admin
      password: test@123
      method: POST
      body: '{ "name" : "{{FQDN}}" }'
      force_basic_auth: yes
      status_code: 201
      body_format: json
      validate_certs: no

   - name: Update Ansible Tower inventory to other groups
     uri:
      url: https://unixarena.tower.com/api/v2/groups/{{item}}/hosts/
      user: admin
      password: test@123
      method: POST
      body: '{ "name" : "{{FQDN}}" }'
      force_basic_auth: yes
      status_code: 204
      body_format: json
      validate_certs: no
     with_items:
            - "{{GROUP2}}"
            - "{{GROUP3}}"
2. Execute the playbook to add the new ansible client in to multiple groups.
How to configure application-consistent backup on Azure native backup? Backup is extremely important for any services that you use on the cloud. Azure native backup takes VM snapshot and transfers to vault for data protection. In the Azure native backup page, have you noticed three different kinds of restore points? Here are the three different kinds of restore points.
Crash consistent
Application consistent
Files-system consistent.
Azure Backup – Restore Point Types
Most of the restore points will be tagged as a file-system consistent backup. Do you know why? Is it enough to recover the application? Nope
Create Crash consistent restore point:
A crash-consistent restore point is only possible if you shut down the VM. In an order to create a crash-consistent restore point, follow the below steps
Shutdown the VM
Trigger the VM backup.
Once the snapshot is complete, you can start the VM.
You no need to wait until the snapshot transferring to the vault.
VM Crash consistent – Azure Backup
Configure Application consistent – Azure Backup
We can’t halt the VM to create a crash-consistent snapshot on a daily basis. At the same time, our applications should start when the VMs boot after being restored. To address this problem, we need to produce application-consistent snapshots. Now you can imagine, application consistency is extremely important. To ensure transactional consistency, applications need to be quiesced and there should be no unfinished transactions when taking a VM snapshot.
Windows VM vs Linux VM
Windows has the Volume Snapshot Service (VSS) framework to ensure application consistent VM backup, but there is no such generic framework for Linux. To ensure your Linux VMs are application-consistent, you can use the Linux pre-script and post-script framework to take application-consistent backups.
How the framework works ?
Application consistent Backup – Azure
How to Configure pre-script and post-script ?
1.Login to Azure Linux VM in which you would like to configure applicaiton consistent backup.
2. From GitHub, download VMSnapshotScriptPluginConfig.json and copy it to the /etc/azure folder for all VMs you want to back up. If the /etc/azure folder doesn’t exist, create it.
3. Please get pre-script and post-script files from the respective application/database team. For example, If you are running myql database, you will be getting pre-scripts to put the database in read-only mode, and postscript will change it back to read write again.
MySQL database:
[root@myvm azure]# mysql -u root -p
Enter password:
Welcome to the MariaDB monitor.  Commands end with ; or \g.
Your MariaDB connection id is 6
Server version: 5.5.65-MariaDB MariaDB Server

Copyright (c) 2000, 2018, Oracle, MariaDB Corporation Ab and others.

Type 'help;' or '\h' for help. Type '\c' to clear the current input statement.

MariaDB [(none)]> CREATE DATABASE wordpress2;
Query OK, 1 row affected (0.00 sec)

MariaDB [(none)]> show databases
    -> ;
+--------------------+
| Database           |
+--------------------+
| information_schema |
| mysql              |
| performance_schema |
| wordpress          |
| wordpress2         |
+--------------------+
5 rows in set (0.00 sec)

MariaDB [(none)]> exit
Bye
[root@myvm azure]#
I have the following pre & post scripts to use for testing purpose.
-rwx------. 1 root root 566 Jun 6 18:02 pre-mysql-backup.sh
-rwx------. 1 root root 569 Jun 6 18:02 post-mysql-backup.sh
drwx------. 2 root root 45 Jun 6 18:38 logs
4. Update the downloaded JSON with pre & postscript file location. (Refer step 2 ).
5. The framework gives users a lot of power. Secure the framework, and ensure only “root” user has access to critical JSON and script files. If the requirements aren’t met, the script won’t run.
Pre & Postscript must be set as 700 (Should be owned by root)
File – /etc/azure/VMSnapshotScriptPluginConfig.json must be set file permission as 600.
6. Trigger the VM backup from the Azure portal. It will trigger the prescript and initiate the VM snapshot. During this phase, it will trigger the postscript once it got consistent backup data. Here is the pre & post scripts logs.
[2020/06/06 19:28:59 UTC] INFO: Starting PRE actions for role master
[2020/06/06 19:28:59 UTC] INFO: Setting read-only status
[2020/06/06 19:28:59 UTC] INFO: PRE for role master finished
[2020/06/06 19:29:09 UTC] INFO: Starting POST actions for role master
[2020/06/06 19:29:09 UTC] INFO: Unsetting read-only status
[2020/06/06 19:29:09 UTC] INFO: POST for role master finished
7. Once the snapshot is done, you can see the new recovery point with application consistent.
Snapshot – Application consistent Backup – Azure
We have successfully configured application consistent backup using the pre & post scripts. Hope this article is informative to you.
How to exclude a specific set of disks from Azure native backup? I had the same question for a long time. Finally, Azure Backup now supports selective disk backup and restore. Why should I backup the disks which are not needed or not useful for any kind of recovery? System/applications might generate a lot of data but we might not need those at the point in time of recovery. When it comes to the cloud, we need to be very precious about every KB of storage that we consume. I would recommend every solution architect to ask the following questions before proposing any solutions.
Do we really need dedicated storage disk to store the data or can you leverage temporary disk which Azure offers?
If you are using dedicated disks, Do we really need those data in the future?
What am I going to backup and how it’s going to be useful?
Azure Backup supports backing up all the disks (OS+ data) in a VM together using a Virtual machine backup solution. This article will give the step by step procedure to exclude the disk from Azure backup. Using exclude disk functionality, you get an option to backup one/ few out of the many data disks in a VM. This provides an efficient and cost-effective solution for your backup and restores needs.
This solution is useful particularly in the following scenarios:
Users who have critical data to be backed up in only one disk and don’t want a backup for the rest of the disks attached to a VM to minimize the backup storage costs.
Users using other backup solutions for part of their VM/ data like they backup their databases/data using a different workload backup solution and they want to use Azure VM level backup for the rest of the data/ disks to build an efficient and a robust system utilizing the best capabilities available.
Note: At this time of writing the article, exclude disk option is in preview mode. You could able to exclude only on command line.
1. Login to azure CLI using cloud shell or use az login from any remote systems.
2. Here is my protected VM using azure native backup.
Snapshot – Application consistent Backup – Azure
3. UAvm1 has an OS disk and one data disk. Here, I will demonstrate how to exclude one of the data disks from Azure native snapshot.
Azure backup – excluded disks
Here is some quick command reference.
Enable Azure backup by excluding specific disks:
# az backup protection enable-for-vm --resource-group {resourcegroup} --vault-name {vaultname} --vm {vmname} --policy-name {policyname} --disk-list-setting include --diskslist {LUN number(s) separated by space}
If the VM is not in the same resource group as that of vault, then ResourceGroup refers to the resource group where vault was created. Instead of VM name, provide the VM ID as indicated below.
# az backup protection enable-for-vm --resource-group {ResourceGroup} --vault-name {vaultname} --vm $(az vm show -g VMResourceGroup -n MyVm --query id | tr -d '"') --policy-name {policyname} --disk-list-setting include --diskslist {LUN number(s) separated by space}
Restore disks
# az backup restore restore-disks --resource-group {resourcegroup} --vault-name {vaultname} -c {vmname} -i {vmname} -r {restorepoint} --target-resource-group {targetresourcegroup} --storage-account {storageaccountname} --restore-to-staging-storage-account --diskslist {LUN number of the disk(s) to be restored}
# az backup item show -c {vmname} -n {vmname} --vault-name {vaultname} --resource-group {resourcegroup} --backup-management-type AzureIaasVM
Note: If data spans across disks, make sure all the dependent disks are included in the backup. If a user doesn’t backup all the dependent disks in a volume, during restore, volume comprising of some non-backed up disks will not be created.
Backups with Disk exclude setting ON only support the ‘Disk restore’ option. ‘VM restore’ or ‘replace existing’ restore options are not supported in this case.
Microsoft Azure offers multiple high availability options to meet customer requirements. Such options really help to build an application with higher SLA levels for their customers. Azure’s availability zone can help you achieve your organization’s reliability goals.
Availability Zones are unique physical locations with independent power, network, and cooling. Each Availability Zone is comprised of one or more datacenters. Availability Zones are tolerant to datacenter failures through redundancy and logical isolation of services.
Availability zone – Supported Azure Regions
At the time of writing this article, availability zones are supported only in North America and Europe. (Look at white dot locations in the below image to know the availability regions.). Get the latest information by referring the Microsoft Azure portal
Azure regions latest
North America:
West Us2
US Central
East US
East US2
Europe:
North Europe
West Europe
France Central
UK south
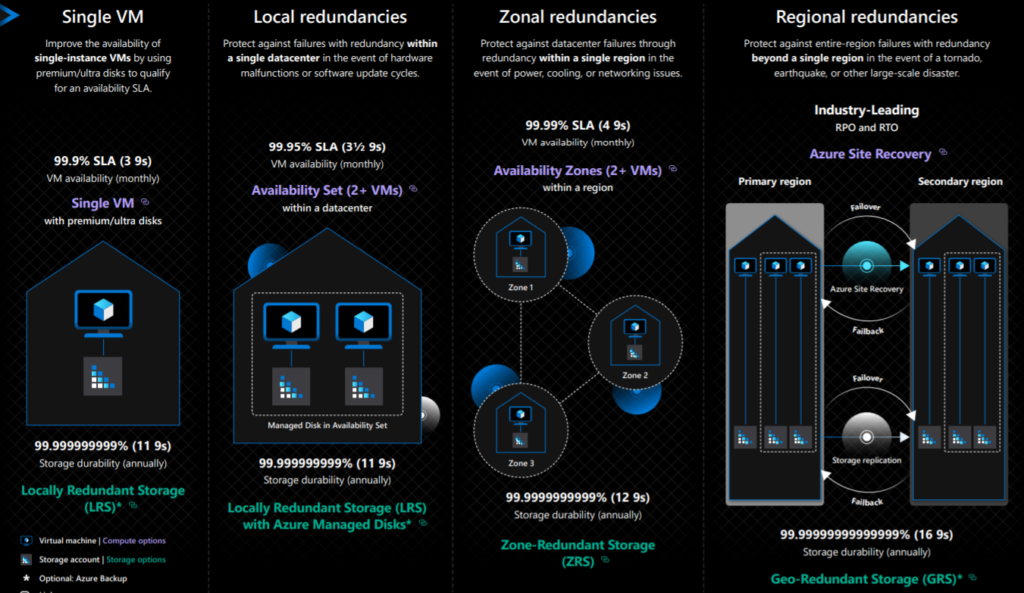
Azure resilience capabilities:
Refer “zonal redundancies” section on the below image.
How your application can be protected using the availability zone?
It’s very simple. Deploy redundant application servers in a different availability zone. The following deployment example from azure portal which shows that deploy IaaS VM in each availability zone and configure zone redundant SQL using DBaaS. The zone redundant load balancer routes the traffics to application servers which are deployed in each region. If we lose one region, still your application will be available from other regions. This is one of the classical example that how you can protect your application by leveraging the availability zone.
Availability zone – Sample HA deployment | SQL – WebApp